Well I am back today as promised and I have a photo tutorial done for you. I hope you liked yesterday's card. I know I am in love with these flowers. I can see myself doing a whole lot of them and just putting them in the UFO box for when I need inspiration.
Here you go -
You will need a circle punch any size. The size of your punch determines the size of your flower. A piece of card stock any color. It's a great way to use up scraps. lol
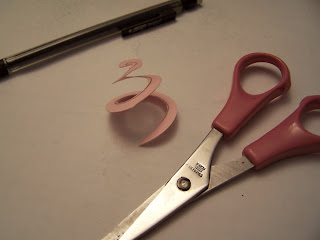
For demo purposes I drew a spiral starting from the center outward. This is just so you can see what I am doing.
Then I cut out the spiral with scissors. If you make the line you are cutting straight then you will have even petals but if you cut in wavy lines then you will have wavy petals. Make sense?
Starting with the outside of the circle, roll the card stock in a tight roll. Don't worry if it is not even. That is the charm of these flowers.
Ok, here you can see how tight my roll is and how uneven it is also.
Once you have all the card stock rolled you should have something that looks like this.
Now you let it go and it should relax a little bit but still remain in a rolled up position.
Once the card stock has relaxed you can add some Tombow Glue to the bottom of the card stock.
Then I press the rose down to give the glue some time to set and to push the petals outward.
Here is the finished rose after the glue has set.
A little smooch spritz and when it dries a little pearl. To add it to a card I just put a couple of glue dots on the bottom. Totally cute right?
Well that's it for today everyone! I have the ladies coming for our card night so I should be back tomorrow with some more creations.
Rosy hugs!


No comments:
Post a Comment