Showing posts with label Christmas. Show all posts

Sunday, December 6, 2015

Penguin Revisited

Hi, everyone!

It's your friendly, neighbourhood Blog Hogger here, continuing to hog Katherine's blog! lol

In my last posting I showed you a card I titled "Photobombing Penguin". (http://inkinbythebay.blogspot.ca/2015/12/photobombing-penguin.html)

I had used a template I got off the internet but a very small version of the template had printed off. While I ran with that size, I wanted to revisit the template using the actual 5 1/2" x 5 1/2" size it was supposed to be.

So, last night I played with that cute penguin template and am really happy with the card I made! I have two sweet girls I will be sending cards to, and think the two penguin cards will be perfect for them!

This card will be for the youngest child:


The penguin stands up proudly and displays his Christmas sign! I particularly like the way he is holding onto the sign, which is causing his beak to be a little open.

Here's a better picture of it:


I cut the beak on a fold so I'd have the back and front of his beak. Then I just folded up and glued together a small piece of yellow cardstock, and popped it into his mouth in order to keep his mouth slightly open and hold the sign. Sometimes it's the little things that make me happy! lol

Except for the beak and eyes, and the addition of the sign, I stayed true to the template. I think he looks super cute!

Here's the details;

  • Cardstock: Textured Basic Black and Daffodil Delight, Whisper White, Crumb Cake, Garden Green
  • Ink: Black Stazon
  • Stamp Set: Sassy Salutations, Hardwood
  • Other: Red Glimmer Paper,1" and 3/4" punches (eyes), linen thread

Super cute hugs,
Colleen


Wednesday, November 25, 2015

And the Flurry Continues...

Hi everyone,

It's the Blog Hogger again. This time I struggled with sharing the next set of Christmas cards with you. "Why", you ask? Because the pictures are all blurry! Yup, every single one of them! I know, I know. Now you're asking yourselves . . . or your nearest and dearest . . . why don't I just retake the pics of the cards? Sigh! Because they are on their way to my daughters' houses, and they live in another province. Poo!

So . . . what to do? Post blurry pics or don't post? Yup, I've chosen to post them anyway, since you can still see the designs easily and, quite frankly, I like the designs. lol

These cards were one-of-a-kinds that I made for the three children of my youngest daughter's partner. (You still following this? lol) When the children (twin girls and a younger brother) heard I was sending my daughter some Christmas cards, they asked to have some too.

I decided to make each of them two card,s which made six in total. I'm pretty sure I promised you four cards in my last post, so just consider the other two as a bonus for having to look at blurry pictures! lol

Card #1:


This card was one of a set of three. All of them are variations on a theme, to hopefully avert any cries of "No fair! You got the pretty one!" lol 

All three cards featured bright primary colors and different embossed backgrounds. The center images were from the retired Scentsational Season stamp set, popped up with Dimensionals on a piece of Whisper White cardstock which had been run through the Big Shot, using three different Framelits. 

Card #2:


Here's the second of the set, using the gingerbread man stamp.

Card #3:


This one is my favourite of the three, I think because it has a Read Red cardstock background!

With each of the cards I tried to match up the background with the Textured Impressions Embossing Folder; wood-grain behind the tree, random spots to mimic the gingerbread men's buttons and eyes, and snowflakes to echo the snowflake on the cup of hot chocolate, as well as the snowflake framelit.

Tip: I used the Textured Impressions Embossing Folders directly on the card base. However, I needed to use cardstock on the inside of the front covers to keep them stable. If I did these cards again, I would use the folders on a piece of 4" x 5 1/4" cardstock and adhere it to the front of the card base. I think they would have looked better that way anyway!
-----------------------------------------------------------------------------------

Shhh! I did a sneaky thing to make the next three cards. I used punch art gift tags, along with some Home for Christmas Designer Series Paper to make each of them. Why is that sneaky? Because I already had the tags made! lol Here's a sample of some of the gift tags.


Card #4:


This one is actually my favourite because I have happy childhood memories of Christmas penguins! Unfortunately, it is also the blurriest, so you'll have to take my word for it that it's really cute IRL.

Card #5:


I love this little elf, with his jaunty hat matching the designer paper. (I just covered the hat from one of the tags I'd already made.) He just looks so adorable!

Card #6: 

This little Rudolph punch art tag was easy to make and, with his googly eye, hopefully he will please one of the children!

Anyway, that's the third set of Christmas cards I have to share with you. Coming soon to a blog near you, however, will be a card I made for a six year old girl. It is definitely NOT a Christmas card but I think it's super cute. It also comes with a story! lol

Super cute hugs,
Colleen


Sunday, November 22, 2015

Christmas Flurry - Part 2

Hi, everyone!

As promised yesterday, I will now show you the last four of the card designs I used for making cards for my daughters.

The first of these four designs is a repeat of one Katherine had us make at a recent class.

Card #1:


It features one of the Sleigh Ride Edgelits Dies and, quite frankly, it is just so quick and easy to do I made tons of them! lol Although you can't see it in this picture, I added some Dazzling Details to the snow to give it an extra sparkle! I used Night of Navy and Whisper White cardstock, and Craft White and Night of Navy ink. The "snow" was made using stamps from retired stamp sets, but could easily replicated using the Gorgeous Grunge stamp set.

Card #2:


Here's another card using one of the Sleigh Ride Edgelits Dies. I also used the Lovely as a Tree stamp set. I didn't want to do more snow in the sky but it needed something to identify it as a Christmas card, so I used a retired snowflake punch and some Silver Glimmer Paper to "shiny" it up! lol I balanced it out by adding some Silver Glimmer Paper to the back of the sentiment.

Card #3:


I freaking LOVE this card, which features a deer from the Home for Christmas Designer Series Paper! It was designed by Tracy May (www.bedlamandbutterflies.co.uk) and as soon as I saw it, I wanted to make it! I used the new heavyweight Whisper White cardstock for the body of the card. It's soooo nice to use in this way! You still get the "clean and simple" look, but with the heft of the other colours of cardstock.

The template for the Marina Mist sponged circle was made with the 2 1/2" circle punch.

Card #4:


I wanted this card to be uber-elegant, with all gold and white accents! I had decided I wanted to use up the last of my gold cardstock to make way for some Foil sheets. (I just love the shininess of those sheets!) 

I used the Patterned Pines and Gorgeous Grunge stamp sets, Whisper White and Gold cardstock, and lots of Gold Embossing Powder.

So, that's the last of the eight designs I used to make my daughters' Christmas cards. However, stay tuned for another (yes, ANOTHER) set of four card designs I used for . . . Never mind! I'll explain all about that tomorrow! lol

Sparkly, creative hugs,
Colleen

Saturday, October 31, 2015

Christmas Card Class!

Hey All!

Quick post today as it is Halloween and I am waiting for my favorite little witch to get dressed and head out the door in Ottawa.

Halloween is a holiday that made a lot of impact on her last year and we have been waiting for this day for a year lol.

So here are the cards for tomorrow's class and there will also be a class on Monday evening using the same cards.

Have a look-


Finding a use for all the little deer I cut out lol!


Got a new set had to try it out!  Peaceful Pines!


New embossing folder and the wonderful window framelit.  Creates a lovely Christmas scene.


Favorite Set ever!  Christmas Cuties!  

So that's my post for today!  

Happy Halloween and stay safe all you little Trick or Treaters!

Hugs!

Friday, October 2, 2015

Christmas Cuties!

Hello Stampers,

You ever have one of those days when everything falls into place?  You know the ones, productive and you feel great!

Well yesterday was one of those days.  I got dinner ready in the morning, (cabbage rolls) got the house cleaned up (before Lunch) and then hit the craft room.  Cleaned up there too,  ate supper and after supper I went back with my IPad to listen to some music and see what I could create.

Music usually sets my mood, and last night it all just seemed to gel.  Myself and another Demonstrator are booked for a Craft Fair on December and I wanted to make some items for this sale.

I took one of my fav sets called Christmas Cuties and went to work.  Found a video on the web with instructions for a gift card/money holder.  So I took some retired Designer Series Paper and some current and cut out 5 1/2" squares.  Then I used the Envelope Punch Board to make the holders.  So simple and totally cute.

Have a look at what I made -

 
Here they are!  So Cute!

 
There are three large image stamps in this set and I love them all.  I used Home For Christmas DSP for the envelope and the new silver and gold foil Doilies (found in the new Mini catalog).  Stamped the angel image in Stazon Black and colored in with Pool Party and Marina Mist, Daffodil Delight, and Hello Honey markers.  I used Blushing Bride for the face and hands.  I had some retired ribbon for the bow.


I first punched the angel out using the 2" circle die but I quickly decided I didn't like the way it was on the gift card holder.  So I just fussy cut around the top and left the bottom rounded.  That worked well thank goodness or I would have had to start over.  I did use a retired snowflake framelit for the background of Green.  But I really love how it turned out.


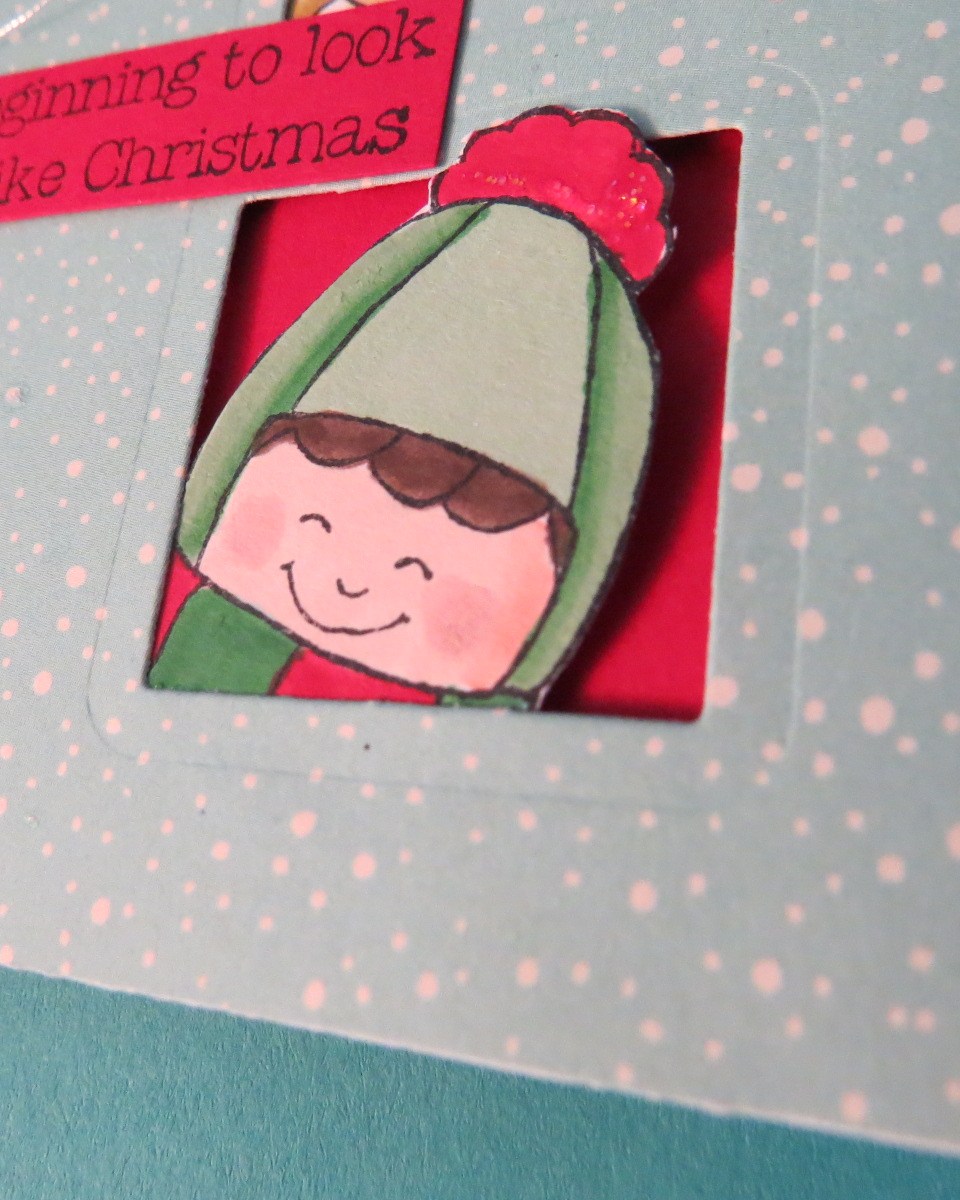
Next image is of a little snowsuit clad cutie.  I colored the snowsuit with Pool party and paper pieced the scarf and top of  his hat using the retired DSP that I used for the gift card holder.  I added a retired greeting and a large Foil Doily.  Ta Da!  Love it!

 
Here is a close up of the image so you can see the DSP I used to paper piece the scarf and pompom.  Can't tell you how much fun I had with this one.

 
Do you see a theme developing?  Found a look and went with it. lol.  Once again Retired DSP and Greeting.  (As I look at it now I may have to move the elf a little cause it looks like Heck the Halls haha)  I colored him in Real Red and Garden Green with Soft Suede for the hair.

 
I added some Tombow glue and fine Gold Glitter to the Bells on his suit.  I also added another layer of Soft Suede to make some highlights in his hair. 
 
So last night was super fun, good music, singing at the top of my lungs, chatting with my friends on Hayday (yes I am addicted)  and creating these "Christmas Cuties"  A perfect way to end a wonderful day.
 
Let me know what you think of today's projects.  Love to hear from you.
 
Self satisfied hugs!

Thursday, September 24, 2015

Whew! Think I have it in the bag!

Hola Stampers!


After much consideration and a lot of input via e-mail (from the ladies involved in the class and others)  I have reached a decision.  After yesterday's dithering it all became crystal clear - I'm over thinking this.

So I knocked a few steps off the pedestal and came up with my four class cards. 

These ones made the cut -


Not too fussy apparently!  This one they like lol!
 
 
This one passed with flying colors!


This one was given the go ahead but the general overall opinion was it was too plain so I bumped it up a bit with the addition of some more glitter just under the sleigh and punched out some stars using Glimmer Paper and the Star border punch.  How about now?  Better?


Here is a picture of the inside -
 
 
Wonderful way to use the negative space left after cutting out the front. 
 
 
And this is the one I didn't show you yesterday.  Hope you like it cause I decided that it would be part of the class already lol.
 
 
This picture really doesn't come close to showing this card.  I used Woodland embossing folder and  brayered Versamark ink over the debossed side of the folder.  After I ran it through the Big Shot I poured Heat and Stick powder over it all and heated it up with the Heat Tool.  then I poured Dazzling Diamonds over the whole piece and tapped off the excess.  I then heated it up again with the heat tool to make the glitter stick.  It is lovely in Real Life.
 
 
Here you can see where the glitter stuck.  Alas I can't seem to get the shimmer of color.  But you will just have to believe me when I tell you that it is lovely.
 
So there it is everyone, my next class.  Lovingly prepared and endlessly pondered.  Can't wait to see all my stampers again after all summer off.
 
Excited hug!


Wednesday, September 23, 2015

Why? Why? Why do I do it?


Hello everyone!

How are you all today?  I'm good but stressed.  If you read the title of this post it will give you some inkling (like the pun?) into my state of mind.  

I am in the process of designing my classes for next Monday and Tuesday in Corner Brook and Stephenville.  But I'm trying way too hard!  Why do I do this to myself?  

A. I'm a control freak
B. I'm a perfectionist (is this the same thing as A?)
C. I strive to blow my Stampers minds EVERY FREAKIN TIME,
D. I have way too many projects to choose from because I want them to experience the new catalog, in apparently, it's entirety!  

So, here I sit, trying to make up my mind and settle on four projects.  But it's so hard.  First I have to settle my mind.  Then I have to make a decision.  

Want to see what I am struggling with?  Ok here you go -

 
I wanted to focus on the new Stamp set called Your Presents by showing how versatile it is.  Not only can you use it for Christmas but Birthdays and Anniversary or anything that combines with a gift.  Looks like a male type of card too.  Bonus!  Those are particularly hard to get right.  lol


As you can see, same style, just different colors and a Seasonal Greeting (retired unfortunately)


I just got this one done this morning and I love the colors.  Also it's a Birthday card.  But alas I think there is too much fussy cutting on the bows for my stampers.  Although I just might risk it.  If you wanted it to be a Christmas card then just change the sentiment. 


Now remember I have to finalize my selections to only four cards, not fifty four!  Getting a little idea of my predicament?
 
 
Next up is one that I love for it's simplicity and ease of making.  While I do enjoy spending time coloring and cutting sometimes you just want to bamm them out the door.  Here is the Jingle All The Way stamp set and Sleigh Ride framelits.
 
 
This is a very economical card, it only uses 1/2 piece of Night of Navy card stock and 1/4 piece of Whisper White.  Love, Love, Love the framelits that match this stamp set.  So much fun to use and well it's a favorite.

 
I want  my stampers to try the Table Salt technique, and this one fits the bill.  Also, they will get to use several new products, the Brick wall embossing folder, the Window framelits called Hearth and Home, the new stamp set Versatile Christmas and the Sleigh Ride framelits.  Wow that's a lot of stuff!


This one also uses the Window and a new embossing folder called Woodlands.  But seriously I think this one is too fussy!  While I like it umm no for class.  Hey that's one decision made.  yippee!!!

 
This is a cute little gift tag I made after I saw one similar on Pintrest.  I didn't have the foliage punch but this works just as nicely.  Do you see where I am going with all this?  Yup, way too many ideas.
 
Please help me with this decision.  Leave a comment and let me know which ones you would like to make.  It would be a great help to me and maybe, just maybe I will get some sleep tonight. lol
 
Lots of hugs!
 
Ps:  I have one more card held back for tomorrow lol.  So stay Tuned!


Monday, September 21, 2015

Cuties!

Hello to all my stamping Friends!

It's a beautiful day here in Newfoundland (finally).  And it's another Monday!  Yup I know you all dislike Mondays but hey they happen and then I blog - something to brighten up your day! 

Now if you don't want to see Christmas Cards yet, look away, cause that's where I am right now OK?  I have all this new product from the Mini Occasions catalog (on the right hand side of this post)  and I just had to play with it.

Of course since I have a little grand-daughter, I am drawn to the more whimsical stamps now.  Before she came into my life I was into flowers and elegant stamps, but I guess with all the cartoons I have been asked to watch (I mean forced to watch), well I guess it finally rubbed off.  I mean how many times can you watch Frozen, Shrek or Monsters Inc. before you go just a little crazy?  Well apparently it's a lot!  Oh and since I have always been a little crazy it's taking just that much longer.

Anyhoo on to my share for today.  I am working with Christmas Cuties.  I love this set it is exactly as promoted - cute. 

Have a lookie loo -


I mean seriously is this not cute?  I used Soft Suede for the card base, Real Red for the background color and a piece of the the new Christmas DSP called Home for Christmas.  You are going to be seeing more of this DSP soon.  It is so nice!
 
I cut out the squares using the smallest Square Framelit.  I started by cutting out the middle square and then just eyeballed the placement for the other two.  Then I stamped out the little kids on Whisper White card stock and colored in with various markers.  I fussy cut them out and glued them to the back of the DSP.  I added dimensionals to the DSP and adhered it to the Real Red.  As you can see some of it is showing through the windows.
 
Once I was satisfied with the placement I added a simple greeting from the same set and an Enamel dot.  I also added some sequins to the top of the card using the fine tip glue pen.  There is some Dazzling Details scattered over the card but the camera is not picking that up.
 
Here is a close up of the kiddies. -
 
 
I used So Saffron and added a accent with Delightful Dijon, the elf is Crumb Cake, Soft Suede and Real Red and Cucumber Crush markers.  I used Blush Blossom for the faces and added Blushing Bride for the cheeks.

 
This little guy has the same colors as the others but for the lighter green I used Pear Pizazz! 
 
Off to the Kitchen to start supper.  It seems like all I do is cook and clean.  Oh and I want to leave you with a joke today!  It's Monday and we need a little laugh right?
 
 
Knock, knock?
 
 
Who's there?
 
 
Megan and chicken
 
 
Megan and chicken who?


He's megan a list and chicken it twice, he's gonna find out who's naughty and nice...
 
I know what am I thinkin? 
 
Chat with you soon!  Cutie Pie hugs!


Wednesday, December 24, 2014

Merry Christmas to all my Friends!

Happy Christmas Eve Everyone!


Well the big day is almost here and little children have already begun tracking Santa on the NORAD site.  My children used to do that when they were little and I miss  that now that my kiddies are grown and have families of their own.

I grow very sentimental around this time of the year as I'm sure everyone does!  I miss my mom and my dad.  Mom is in North Bay, Ontario, miles away but only a phone call away thank goodness, and my dad passed almost 30 years ago.  But around this time of year he is so close to me sometimes I can almost feel his presence.

I listen to Christmas Music and think of years gone by.  Things have changed in our lives but I am still thankful for family and friends.  I have been blessed with a loving family and a beautiful granddaughter, Emily, who has brightened our lives and made us believe in Santa again.  We will be on Skype tomorrow morning enjoying Christmas with her. 

 
Emily at a Christmas Tree Farm! 

 
Emily and Santa!


I have also been blessed with so many wonderful friends, most of whom I have met over the course of seven years with Stampin' Up!  I would never had had the pleasure of meeting these people if not for this craft. 

So at this time of the year I would like to take this opportunity to thank my many friends and family and thank all of you for your support this last year.  Without you I would never be able to do what I love so much!


Today I will be sharing the card I did for Emily for Christmas.  She got a three D card using Frozen as my theme!  I saw some of these box cards done and adapted some of the elements to make her special Christmas Card.

Have a little look -


If you've ever seen the  movie you will recognize Olaf the snowman.  I know that Emily loves Olaf and I wanted to give her a card from that movie.  This card folds up and fits into a regular envelope.  I did however make my envelope a little larger as I wanted to add some stiff card board to protect it in the mail.

 
This was the back!  I used the retired stamps from Festive Flurries and Coastal Cabana and Smoky Slate Card stock.

 
Once again I broke out the retired products lol.  This is the snowflake punch. 

 
If you have seen the movie you will know that when Olaf appears to Anna and Sven they are in a forest of ice crystals hanging from the trees.  I tried to re-create that effect here.  I used white bakers twine and rhinestones.  Hung them from the tree from Take Care.

 
Olaf was a punch art project for sure.  Ovals and circles and I cut his hands and hair free hand.

 
This was the front of the box.

 
These pictures don't do this card justice to show you how sparkly it really was.  But now Carrie has the card and she has it displayed  for Emily to see.  Not sure how impressed she was with it but hey Carrie gets it right?  And I really tried!  lol
 
 
So that's it for today!  Doing some cleaning and just tweaking a few things today.  Went out for breakfast and enjoyed my morning with my hubby! 
 
 
So everyone have a safe and happy holiday filled with family, friends, and good times.
 
 
Merry Christmas to all!  


Tuesday, December 9, 2014

A few Projects!

Hi there Crafty Peeps!

I have had the most excellent three weeks!  Classes galore and lots of designing of classes and card stock flying everywhere.  But now the classes are over for this year and I am in the craft room putting the finishing touches on my cards.

I have so many to send out and while I am really great at making them I am not so great on finishing the insides.  I would much rather have the fun making them I guess.  But Christmas is not going to wait for me so I must resign myself to a schedule. lol

I have several finished projects to share with you and over the next week or two will do so.  I hope you enjoy the cards and the tags and I have one special card that I made for Emily to share with you but I have to wait until my DD sees it as I don't want to spoil the surprise.  I have to tell you it is probably the cutest card I have ever made and it kills me to have to wait to show you all. 

But alas I must! 


So here are today's shares -

 
This was a card I submitted to SU for a little contest.  I didn't win but I did have so much fun creating this beauty!  I used Island Indigo for my accent color.  I love this color so much.  I am drawn to blues and this one is really rich and lush.


I used a direct to paper technique.  The colors I used were Coastal Cabana, Pool Party, and Island Indigo for the sky.  The sand was Crumb Cake, Soft Suede, and Early Espresso.  I stamped the bird images with Memento Black and the Grass.
 
I used the three blue colors on the Feathers.  I added a little versamark ink around the edges of the feathers and then picked up some silver embossing powder just on the edges.  I added them to the card using dimensionals.  I wanted the feathers to appear as if they were floating to the ground.  I love the colors and it was an easy card to do.


This card was done in my "Special Cards for Special People"  I used the star framelits to cut out a star in the front layer.  I ran the card stock through the Northern Flurry embossing folder to give it some texture.  Added the Santa from "Get your Santa On" set and a greeting held with some washi tape.  Fun little card to do.
 
Well that's it for today folks.  Back as soon as I get another 10 minutes to myself. lol
 
Rushed hugs!