Showing posts with label Build a Blossom. Show all posts
Showing posts with label Build a Blossom. Show all posts
Thursday, April 21, 2011
A Tisket a Tasket - a Build a Blossoms Basket!
Well Ladies I have missed the deadline for mail out for today's post but at least you can look at my new video on how to Build a Blossom Basket now or wait for it in you e-mail tomorrow. lol The video took much longer to upload than I had hoped. I don't know if it is my connection of the length of this video. But done is done.!! Now have yourself a good laugh by watching it and apparently the silly movie saved the wrong intro cause it starts over twice. I just can't go back and edit this now I just don't have the time. Please forgive me for the mistakes....
So Ladies here it is in all it's glory. I apologize for the music in the background, I forgot to turn off the radio upstairs. I like to work to music, I get a lot more done than I do with the TV on. I have a guest stamper for tomorrow but I will be taking the Easter weekend off from posting as I am going to have company for Easter Sunday dinner and need to get some cooking/baking done. Blossoming Hugs!


Monday, March 7, 2011
I think I have it!
Good day everyone! I have spent the better part of three days trying to get this video done. It took me quite awhile to edit it and even then I'm not quite satisfied. But I am getting the hang of it. I also figured out the format so it uploaded to You Tube. So with that being said I am going to post it anyway. Finished or not. The next one will go smoother (I hope :O) This will be a regular segment on my blog called "Proud or our Products!" So look at the video and try not to judge too harshly. lol I am probably my worst critic. I almost sound Aussie " Good day mates!" hahaha. But I am having fun so I guess that counts for something right?
Don't forget everyone only a couple of weeks left of Sale A Bration. So if you are considering an order now is the time. Until the end of March for every 60.00 you spend you get a free product from the SAB catalog.
I have seen the new preview for the April promo and it is FINE! I am ordering the pre-order and should have something for you as soon as it arrives. (Just going to make you crazy waiting!)
Well if I don't say so long for now this won't get to you today. So chat with you later. Movie Star hugs!
Don't forget everyone only a couple of weeks left of Sale A Bration. So if you are considering an order now is the time. Until the end of March for every 60.00 you spend you get a free product from the SAB catalog.
I have seen the new preview for the April promo and it is FINE! I am ordering the pre-order and should have something for you as soon as it arrives. (Just going to make you crazy waiting!)
Well if I don't say so long for now this won't get to you today. So chat with you later. Movie Star hugs!
Thursday, March 3, 2011
World News
Haha bet you thought I had turned this blog into a news program but you are wrong! Maybe it is not World news but it IS my world news. As most of you know by now my daughter Carrie is getting married this August. I am smack dab in the middle of invites, party favors and now I am throwing in Dress shopping. Yes ladies I am going to be out of town from Mar. 22nd to Apr. 5th. (Whatever will my DH do?) I am flying to Ottawa to help her pick out the gown. I will also be trying to find a suitable dress and shoes for myself. Why oh why couldn't she have gotten married when I was a size 10? ( mind you I was around 14 years old at the time lol) I will probably not be posting much during this two week period but I will try.
Today I have a photo tutorial for you. I was hoping to have a new video but after spending most of the day trying to upload and edit theda@# silly thing I knew that I wouldn't get this post done in time for you to get it today. So here is a quick tutorial on the new Build a Blossom stamp set and punch.


Today I have a photo tutorial for you. I was hoping to have a new video but after spending most of the day trying to upload and edit the
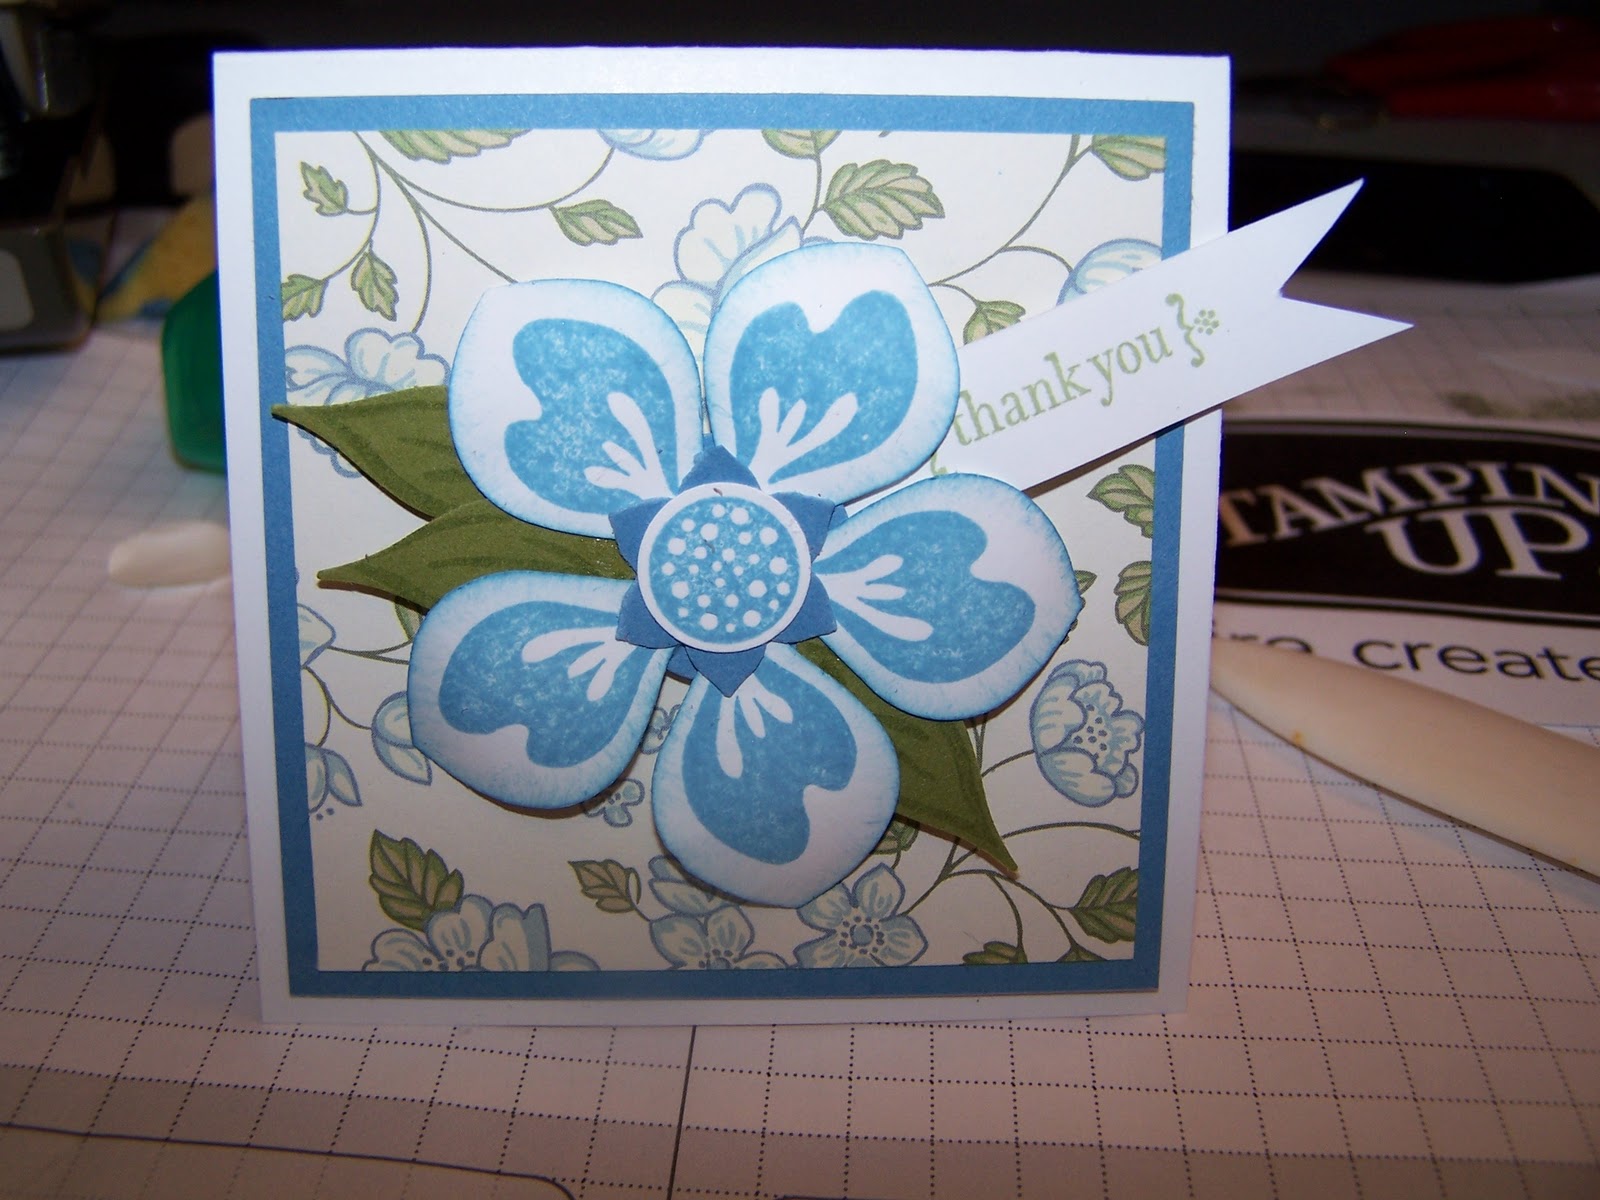
This is a 3" x 3" Note card

First I stamped out 5 blossoms using Marina Mist and Whisper White card stock. Then I punched them out using the Blossoms punch. So easy. I also punched out a star shaped flower using Marina Mist c/s and the Boho Blossoms punch.

I also punched out a circle in the same color, I will use this circle to adhere the petals of my flower. Notice the sponge? I sponged around the edges of the flower petals.

I then used my tombow glue to adhere them to the circle.

I stamped out the center of the flower with Marina Mist and punched it out with the 1/2" circle punch

Then I stamped with Pear Pizzazz and used the smallest leaf on the same color c/s and punched out with the blossoms punch

I glued the star shape in the middle and then I used the bone folder to create a curve on the blossoms.

I added the leaves and some dimensionals and put it on to the note card. I layered Marina Mist c/s cut at 2 3/4" x 2 3/4" and the Springtime DSP cut at a little less about 2 1/ 2" x 2 1/2".

Once all this was glued on I took a sentiment and made a banner out of it and stamped my greeting in Pear Pizzazz.

Finished yay! now to go back to work on that blankety blank video.
Beautiful blossoms punched out just for you. Hugs!
Subscribe to:
Posts (Atom)