Hey there, all you crafty people!
It's the Blog Hogger here to share a couple of Valentine's Day cards I made. Sadly, there's no funny story to go with these cards. (Did I hear a collective "awwwwww"? lol) I'm so sorry to let you down, but the cards came together pretty quickly, with the second card being a CASE (Copy And Share Everything).
So, here's the first one:
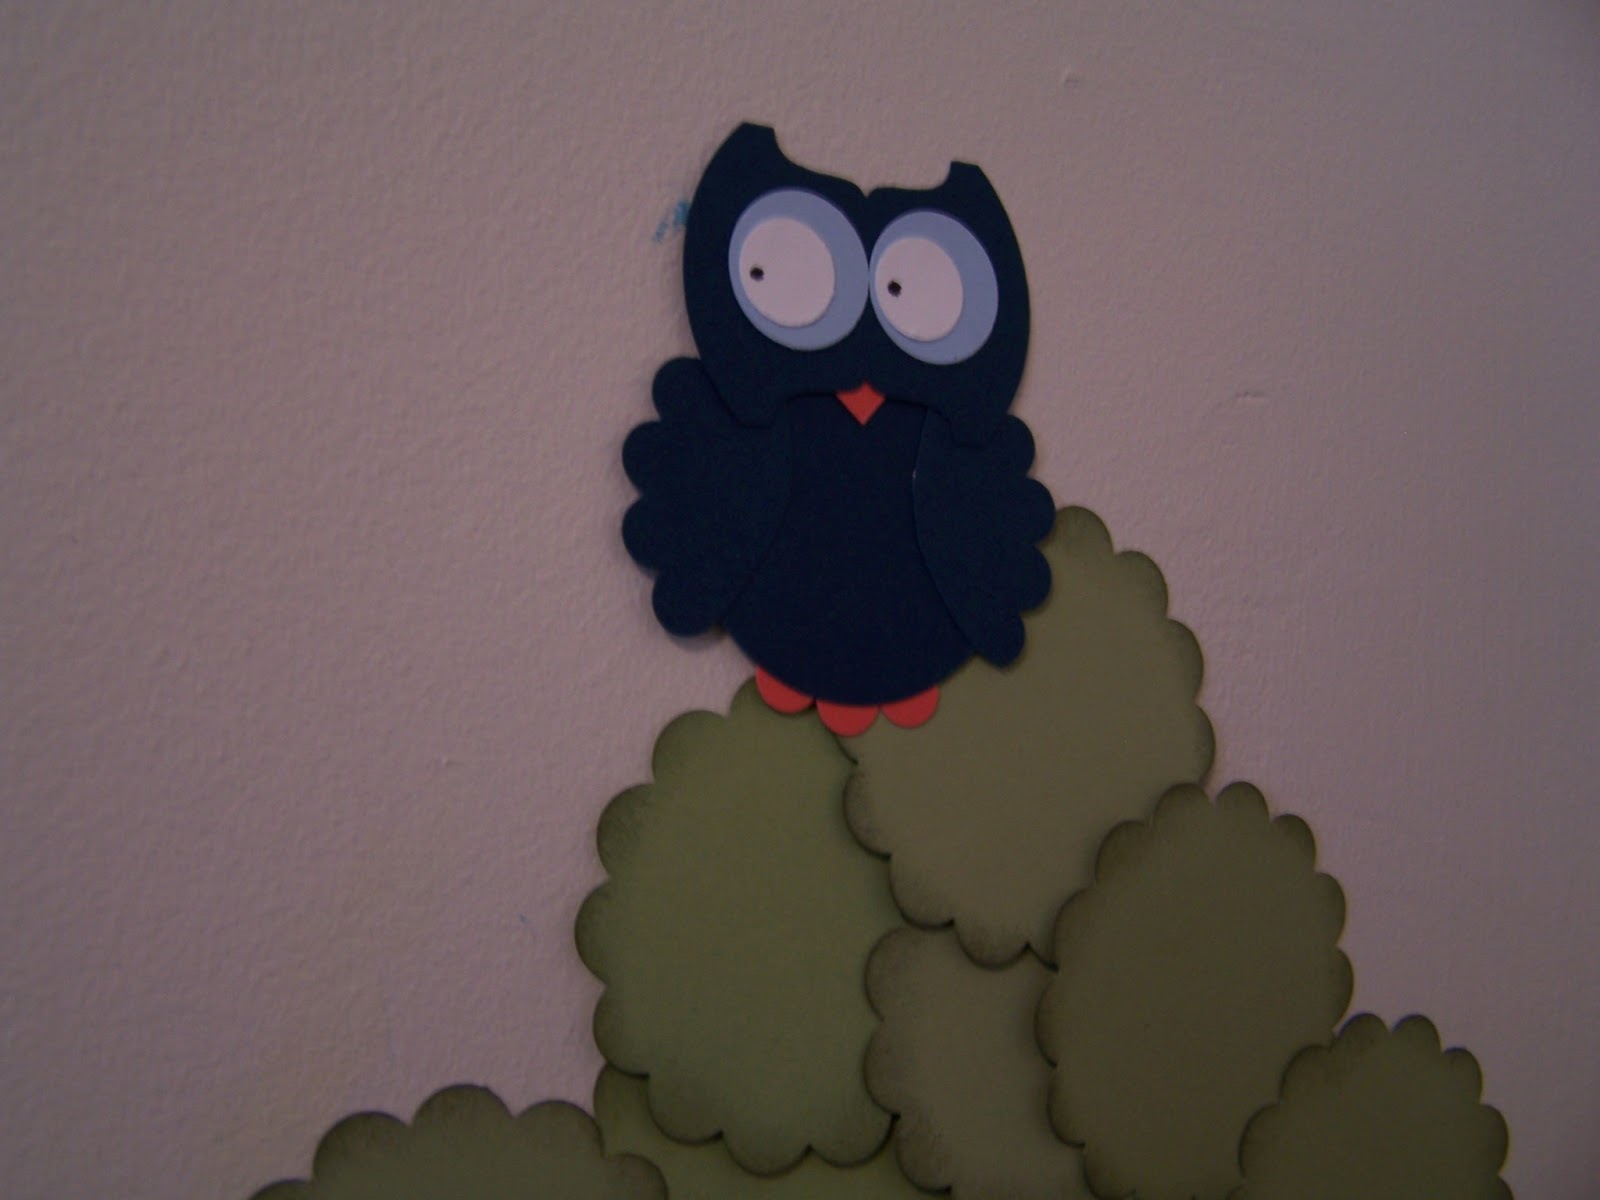
It's pretty obvious this card features the Owl Builder Punch, along with a discontinued heart punch. The sentiment is from the Teeny Tiny Wishes stamp set.
The owl's dress/vest/front thingie was punched out of Red Glimmer Paper, while the hearts were punched out of Red and Gold Glimmer Paper. The green stem was punched out in Old Olive cardstock using the Bird Builder Punch.
While I love the owl with his googly eyes, my favourite part of this card is the fold. The front section measures 2 1/2" x 4" and was cut out of Very Vanilla cardstock. The Pretty in Pink section measures 2 3/4" x 4 1/4".
The main section of the card was made using Real Red cardstock and some coordinating designer paper and measures 4 1/4" x 11", scored at 2 3/4" and 5 1/2". The section you can't see contains a brief message to the recipient on Very Vanilla cardstock.
Here's the second card:
I love doing punch art! I found this baby bird on Pinterest, aka "The Center of the Universe". lol
I found it here: http://www.paperpunchaddiction.com/2010/06/silly-bird.html. Kim Score gives a very easy-to-follow tutorial on her blog.
I thought the bird was absolutely adorable and only made a couple of minor changes to it, substituting punches I had.
The card base is Pretty in Pink cardstock, with coordinating designer paper cut at 5 1/2" and scored at 4 1/4". The Whisper White section measures 2 1/2" x 4" and the Pretty in Pink section measures 2 3/4" x 4 1/4".
Valentine hugs for everyone,
Colleen
Showing posts with label Punch Art. Show all posts
Monday, February 1, 2016
Saturday, November 28, 2015
Yellow Sparkles and Princesses!
Hi, everybody!
It's the Blog Hogger with a card and a story to share with you!
I have a sweet six-year-old first cousin twice removed who loves the colour yellow, sparkles and glitter, and princesses, along with other interests! Now, the most surprising part of that sentence is probably that I understood how the "twice removed" part of the cousin tree works! lol (Her grandmother and I are first cousins. Her mother and my daughters are second cousins. Their children would be third cousins. However, her and I are first cousins twice removed from the original cousin connection [her grandmother and me]. Clear? No? lol)
Anyway, I sat here one day and tried to figure out how to make her a card that reflected her personality. Obviously, I would use yellow cardstock. Glitter and sparkles would also be easy to incorporate. Princesses, princesses.... How would I do a princess?
After perusing Pinterest for WAY too long, I decided to make a pretty princess dress for the front of the card! (As opposed to making an ugly princess dress? lol)
So I cut and punched and glittered-up (yes, that's a word . . . in my world) a beautiful card! And I was proud of it! In fact, I was so proud of it, that I cornered my husband and flourished it in his face, saying, "Isn't it gorgeous?"
And my adorable husband said . . . and I quote . . . "What is it?" And then he said, "I don't get it? Is it some type of bug?"
BUG? BUG? Are you freaking KIDDING me?
Here's the card. See what you think!
Can't you readily see that it's a princess' dress? Well, maybe it looks a little teeny tiny bit like a bug . . . or something not particularly princess-like.
See, once he put that idea in my head, it wormed around and had me doubting myself. But what was I going to do to fix the problem? I could start all over again from scratch . . . but THAT wasn't going to happen. No, sirree! I was going to just tweak that card and make it perfect! More perfect than it already was! Of course, since I'd thought the card was finished, everything was already glued down so it was going to be a bit of a challenge . . . but I could DO IT!!!
So, I punched and cut and punched and cut some more! I sweated and thought and agonized and fiddled and said a few not-very-nice words and voila! With very little effort (lol) I had a card that was SOOOO much better that the original!
What do you think?
From the top of her curly hair to the bottom of her glittery shoes, she screams princess! She's even wearing princess-y gloves and has a sparkly headband (that could be seen as a tiara)!
I'm much happier with the card now and have learned a very important lesson: Don't ask my husband his opinion about cards I make! lol
Truthfully, I'm glad I asked his opinion and readily see the irony of him giving me advice on princess cards. [If you knew my husband, you'd appreciate the irony also. :)]
Although it was a lot of extra work to get this card to the end product, the hardest part was seeing the sparkle of delight in my husband's eyes when I showed him the final product, a sparkle that was accompanied by a chuckle and a knowing look. Yes, he was right, folks, and he knew it! lol
Superior hugs,
Colleen
It's the Blog Hogger with a card and a story to share with you!
I have a sweet six-year-old first cousin twice removed who loves the colour yellow, sparkles and glitter, and princesses, along with other interests! Now, the most surprising part of that sentence is probably that I understood how the "twice removed" part of the cousin tree works! lol (Her grandmother and I are first cousins. Her mother and my daughters are second cousins. Their children would be third cousins. However, her and I are first cousins twice removed from the original cousin connection [her grandmother and me]. Clear? No? lol)
Anyway, I sat here one day and tried to figure out how to make her a card that reflected her personality. Obviously, I would use yellow cardstock. Glitter and sparkles would also be easy to incorporate. Princesses, princesses.... How would I do a princess?
After perusing Pinterest for WAY too long, I decided to make a pretty princess dress for the front of the card! (As opposed to making an ugly princess dress? lol)
So I cut and punched and glittered-up (yes, that's a word . . . in my world) a beautiful card! And I was proud of it! In fact, I was so proud of it, that I cornered my husband and flourished it in his face, saying, "Isn't it gorgeous?"
And my adorable husband said . . . and I quote . . . "What is it?" And then he said, "I don't get it? Is it some type of bug?"
BUG? BUG? Are you freaking KIDDING me?
Here's the card. See what you think!
Can't you readily see that it's a princess' dress? Well, maybe it looks a little teeny tiny bit like a bug . . . or something not particularly princess-like.
See, once he put that idea in my head, it wormed around and had me doubting myself. But what was I going to do to fix the problem? I could start all over again from scratch . . . but THAT wasn't going to happen. No, sirree! I was going to just tweak that card and make it perfect! More perfect than it already was! Of course, since I'd thought the card was finished, everything was already glued down so it was going to be a bit of a challenge . . . but I could DO IT!!!
So, I punched and cut and punched and cut some more! I sweated and thought and agonized and fiddled and said a few not-very-nice words and voila! With very little effort (lol) I had a card that was SOOOO much better that the original!
What do you think?
From the top of her curly hair to the bottom of her glittery shoes, she screams princess! She's even wearing princess-y gloves and has a sparkly headband (that could be seen as a tiara)!
I'm much happier with the card now and have learned a very important lesson: Don't ask my husband his opinion about cards I make! lol
Truthfully, I'm glad I asked his opinion and readily see the irony of him giving me advice on princess cards. [If you knew my husband, you'd appreciate the irony also. :)]
Although it was a lot of extra work to get this card to the end product, the hardest part was seeing the sparkle of delight in my husband's eyes when I showed him the final product, a sparkle that was accompanied by a chuckle and a knowing look. Yes, he was right, folks, and he knew it! lol
Superior hugs,
Colleen
Tuesday, October 20, 2015
Happy Halloween to Emily!
Hey there stampers!
How are we all doing? I had such a fun afternoon today I just had to share it with you all.
I decided to send Emily a Halloween card because although she is only three now, Halloween has made a huge impact on her life. She went out last year as Olaf and was adorable. Since then she is into Monsters, Vpires (Vampires) and Bats and of course Witches, ghosts and assorted Halloween decorations. This has been going on ALL YEAR! It's so cute and funny!
So I decided to send Emily a Halloween Card and of course it has to feature a witch as this year she will be going in a witch costume. The card features some very fussy punch art, but it turned out so much better than I had hoped.
I found this punch art witch on Pintrest so will not take credit from another creative person. I did take some liberties though so, I guess it is some of me. lol.
Have a look at what I made -
How are we all doing? I had such a fun afternoon today I just had to share it with you all.
I decided to send Emily a Halloween card because although she is only three now, Halloween has made a huge impact on her life. She went out last year as Olaf and was adorable. Since then she is into Monsters, Vpires (Vampires) and Bats and of course Witches, ghosts and assorted Halloween decorations. This has been going on ALL YEAR! It's so cute and funny!
So I decided to send Emily a Halloween Card and of course it has to feature a witch as this year she will be going in a witch costume. The card features some very fussy punch art, but it turned out so much better than I had hoped.
I found this punch art witch on Pintrest so will not take credit from another creative person. I did take some liberties though so, I guess it is some of me. lol.
Have a look at what I made -
My card turned into a Door Hanger! Lol. Thought that it was a cool idea for her room. Lots of retired punches and lots of glue.
Here is a closer look at the punch art. I love how it turned out. I hand drew the face. Love the little mouth as it really reminds me of Emily. She has a quirky smile sometimes.
Cutest Pumpkin in the patch!
What do you think? I would like to thank Kim Score for the idea and all the hard work it must have taken to figure it all out.!
That's it for me today I have to fly!
Punchy hugs!
Wednesday, August 26, 2015
Can't Find the Post!
Hey there everyone!
I looked and I looked but I could not find the Death Star card I sent my son a few years back. But I found the place I used for inspiration.
Here is the Pintrest address if you are interested. She even had a video. And I totally followed along with her. And it really looked like hers. (really)
My son liked it so much he had it framed. Now how's that for a good Job?
Here you go:
https://www.pinterest.com/pin/323062973245020777/
Here is a picture:
I looked and I looked but I could not find the Death Star card I sent my son a few years back. But I found the place I used for inspiration.
Here is the Pintrest address if you are interested. She even had a video. And I totally followed along with her. And it really looked like hers. (really)
My son liked it so much he had it framed. Now how's that for a good Job?
Here you go:
https://www.pinterest.com/pin/323062973245020777/
Here is a picture:
Heading back to the trailer tonight but there are only 10 days left so will be back soon.
Inspired hugs!
Tuesday, August 25, 2015
A Star Wars Birthday Card
Hey there loyal readers,
You would have to be loyal to stay with someone who takes so many breaks. I have been away for the summer and enjoying my vacation in Ontario.
But I am home now and trying to get back into blogging and doing some projects. I have my pre-order in for the new catalog that will be out on September 01. I didn't want to have my package come while I was gone so ordered a little late.
Today's card is for my son, Colin who will be celebrating his birthday on Sept. 06. He is a big Star Wars fan and every year I try to come up with an over the top card for him. This year I spend most of my afternoon playing with punches and scissors (when I couldn't get a punch to do the job lol). I got some inspiration from various punch art that I saw on line but the comments are mine.
So here is my card -
You would have to be loyal to stay with someone who takes so many breaks. I have been away for the summer and enjoying my vacation in Ontario.
But I am home now and trying to get back into blogging and doing some projects. I have my pre-order in for the new catalog that will be out on September 01. I didn't want to have my package come while I was gone so ordered a little late.
Today's card is for my son, Colin who will be celebrating his birthday on Sept. 06. He is a big Star Wars fan and every year I try to come up with an over the top card for him. This year I spend most of my afternoon playing with punches and scissors (when I couldn't get a punch to do the job lol). I got some inspiration from various punch art that I saw on line but the comments are mine.
So here is my card -
I used Basic Black and Old Olive and Pear Pizazz for my colors. The Black background is a salt technique. I will be teaching this in one of my classes this fall. The card stock is actually Whisper White and brayered with Basic Black ink. Looks like a starry background.
Yoda is made using retired punches and some that are still current. Ornament punch, Build a Blossom punch and various circles. I did do some fancy cutting to get the general shape. I used the Northern Flurry embossing folder to get the wrinkles. And cut up some Tissue paper for the tufts around the ears.
The light sabre is done using vellum card stock and basic black and silver foil paper. The sentiment is mine.
This is the inside of the card. Thought I would go with a funny saying. And since I'm sure there will be cake I think this works, don't you?
Punch cards take a lot of time to get it just right, but when you get it right there is a lot of satisfaction that I get knowing the card will bring a smile to his face.
A couple of years ago I did a Death Star. That was a labour of love I can tell you. I will see if I can find it on this blog and link it to this post.
So that's it for today. Enjoy the rest of the day.
Puny hugs!
Monday, August 17, 2015
More Decorations!
Once again I have been out of the loop! Camping really cuts into my crafting, and for better or worse (wedding vows), by hubby loves the trailer and Big Falls! Me not so much lol!
But I do have some more birthday decorations to show you so please try to put up with my sporadic posts. Here is the punch art I used on Emily's birthday decorations.
First up is the cutlery holder! I used Age Awareness and Elegant Eggplant ink and Coastal Cabana for the dots! The napkin will be either green or teal or purple! I am using up a lot of retired products for this.
Thursday, July 2, 2015
Baby here I Come!
Hi Stampers,
Well Today I thought I would share a card I made for one of my demo friends daughter. She is having a baby sometime the end of July and asked me to the shower.
Which is lovely except I loaned her all my baby stamps. So because of that I had to get creative. I found some punch art on the web and made this card. It was a lot of fun to do. I love doing punch art. While it takes a lot of time and sticky fingers I love the fact that SU punches are so versatile. You literally can create anything. In the next little while I will show you what I mean.
Did I actually create these from scratch, Yes. Did someone more creative than me originally create them Yes! So thank you from the bottom of my heart for those people, cause they make my job so much easier. lol
I used Whisper White as my base and a piece of retired DSP for the background. The lion was the scallop circle and 1 3/8 " punch the ears were from the retired itty bitty punch pack and the eyes were the owl builder punch. The nose was a circle from that punch also. The tail was a curved piece I made with the circle punch and the tip was just something I cut out free hand. Whew a mouthful!
The giraffe was also a retired small oval punch. The Neck I cut from a strip of card stock. I used Pool Party and Island Indigo card stock. I cut the circles out with the owl builder punch and the neck edging was the scallop border punch. I just colored in the eyes using a Project Life black pen.
The elephant was made using the small oval punch and the face was the 1 inch circle punch. I cut the trunk free hand and eyes were done using the Project life pen.
A lot of the punches I use are retired but when you need them it's nice to have them so I don't usually get rid of them, and this card illustrates why. lol.
So bring on the Baby! And that's it for me today!
Punchy hugs!
Well Today I thought I would share a card I made for one of my demo friends daughter. She is having a baby sometime the end of July and asked me to the shower.
Which is lovely except I loaned her all my baby stamps. So because of that I had to get creative. I found some punch art on the web and made this card. It was a lot of fun to do. I love doing punch art. While it takes a lot of time and sticky fingers I love the fact that SU punches are so versatile. You literally can create anything. In the next little while I will show you what I mean.
Did I actually create these from scratch, Yes. Did someone more creative than me originally create them Yes! So thank you from the bottom of my heart for those people, cause they make my job so much easier. lol
I used Whisper White as my base and a piece of retired DSP for the background. The lion was the scallop circle and 1 3/8 " punch the ears were from the retired itty bitty punch pack and the eyes were the owl builder punch. The nose was a circle from that punch also. The tail was a curved piece I made with the circle punch and the tip was just something I cut out free hand. Whew a mouthful!
The giraffe was also a retired small oval punch. The Neck I cut from a strip of card stock. I used Pool Party and Island Indigo card stock. I cut the circles out with the owl builder punch and the neck edging was the scallop border punch. I just colored in the eyes using a Project Life black pen.
The elephant was made using the small oval punch and the face was the 1 inch circle punch. I cut the trunk free hand and eyes were done using the Project life pen.
A lot of the punches I use are retired but when you need them it's nice to have them so I don't usually get rid of them, and this card illustrates why. lol.
So bring on the Baby! And that's it for me today!
Punchy hugs!
Monday, October 27, 2014
Cards with a Child!
Hey there, everyone!
It's the Blog Hogger here. Yesterday I invited one of the neighbor children to make cards with me. Olivia is nine years old (almost ten tho' as she was quick to point ou) and has seen the many "toys" I have here for making cards. Last week we chatted about making some birthday cards for her friends . . . and I quickly realized I had opened Pandora's box! :)
Olivia had very definite ideas on what she wanted to make for each friend . . . VERY definite ideas! lol So, yesterday we got together for a while and I absolutely had a blast with her! Her ideas were awesome and she was quick to identify new ways to use some of my product. Ah, to be young and able to quickly think outside the box! :) She is definitely a natural at making cards and I'm already looking forward to our next session.
I told her I was going to post her cards on Katherine's blog and she was really excited about it!
Anyway, here's one of the two cards we made:
This was one of the cards she had envisioned even before we started. I had made a Pikachu (Pokemon) card for her brother's birthday and she wanted to make a "minion" card for her friend. I proudly showed her the one I had made (http://inkinbythebay.blogspot.ca/2014/10/minions-card.html), but she wanted the minion to use up the whole card front, like I had done for the Pikachu one.
We googled it and found this one on www.splitcoaststampers.com/gallery/photo/2421242. We stayed true to the original and Olivia came up with the idea of punching out a 1 1/4" circle to help her draw the mouth. I got elected to do the hair! lol
Her second card was a more traditional cupcake card:
We used the Create a Cupcake stamp set, along with the corresponding Build a Cupcake punch. This one was very much her design, and I really liked her idea of putting candles along the edges. Luckily her friend is turning ten so it made for a nice even number of candles. The candles were made from some scrap Designer Paper. When Olivia saw the pattern on each side, she quickly decided to alternate the side used for each candle.
So, there you have it! Two pretty cards and one fun afternoon! :)
Childlike hugs,
Colleen
It's the Blog Hogger here. Yesterday I invited one of the neighbor children to make cards with me. Olivia is nine years old (almost ten tho' as she was quick to point ou) and has seen the many "toys" I have here for making cards. Last week we chatted about making some birthday cards for her friends . . . and I quickly realized I had opened Pandora's box! :)
Olivia had very definite ideas on what she wanted to make for each friend . . . VERY definite ideas! lol So, yesterday we got together for a while and I absolutely had a blast with her! Her ideas were awesome and she was quick to identify new ways to use some of my product. Ah, to be young and able to quickly think outside the box! :) She is definitely a natural at making cards and I'm already looking forward to our next session.
I told her I was going to post her cards on Katherine's blog and she was really excited about it!
Anyway, here's one of the two cards we made:
This was one of the cards she had envisioned even before we started. I had made a Pikachu (Pokemon) card for her brother's birthday and she wanted to make a "minion" card for her friend. I proudly showed her the one I had made (http://inkinbythebay.blogspot.ca/2014/10/minions-card.html), but she wanted the minion to use up the whole card front, like I had done for the Pikachu one.
We googled it and found this one on www.splitcoaststampers.com/gallery/photo/2421242. We stayed true to the original and Olivia came up with the idea of punching out a 1 1/4" circle to help her draw the mouth. I got elected to do the hair! lol
Her second card was a more traditional cupcake card:
We used the Create a Cupcake stamp set, along with the corresponding Build a Cupcake punch. This one was very much her design, and I really liked her idea of putting candles along the edges. Luckily her friend is turning ten so it made for a nice even number of candles. The candles were made from some scrap Designer Paper. When Olivia saw the pattern on each side, she quickly decided to alternate the side used for each candle.
So, there you have it! Two pretty cards and one fun afternoon! :)
Childlike hugs,
Colleen
Wednesday, October 15, 2014
Minions Card
Hi there again!
It's the Blog Hogger here with a special punch art card I made for a good friend of mine. She is an absolute sweetie and will, I'm sure (I hope? lol), think this card is adorable . . . even tho' she's a grown woman and not a nine year old! I mean, seriously? Who wouldn't love to have their own minions! lol
Anyway, here's the card:
I think it's hilarious, but as Katherine pointed out, I have been stuck in the house for two months and little things amuse me way more than they used to! lol
Katherine watched me make the smaller minion on Sunday and noted that it was a fair bit of work. I have to agree with her and certainly wouldn't make this card a number of times, but I completely enjoyed designing it, using a picture of two minions as inspiration. Yup, that means it is an original!
Now let's see if I can translate those minions into a picture tutorial. :) I'm going to explain how to do the one-eyed minion...
First, here's the pic which shows the different sizes and punches used for everything except the eye:
I started out with using the Word Window punch to make the arms, but trimmed them down because they just looked too bulky to me. I also shortened them so they wouldn't hang down past the feet.
Next, I'll show you how I rounded the top of the head:
I cut the strip of So Saffron cardstock just slightly smaller than the 1 1/4" circle punch and rethreaded it through the top. I cut the 3" length after I did this step.
The next picture shows the sizes for the eye:
I had to use a non-Stampin' Up punch to get the brown circle, since I needed it to be much smaller than the white circle. However, the white and black circles are from the Owl Builder punch.
This is how I made the denim look for the pants. It's a two-step process:
Simply swipe the large Night of Navy ink pad over a piece of Soft Sky cardstock in one direction.
Next, turn the cardstock and swipe it in the other direction. Easy!
Don't forget to darken the edges before you assemble your minion. I used a Night of Navy marker to darken the denim edges.
I sponged the edges of the So Saffron and Smoky Slate cardstock. I used a Sponge Dauber to do the little ring since it was so small and getting the middle of it sponged was just easier with a Sponge Dauber.
And that's it! I used Basic Black cardstock for the body of the card and Tempting Turquoise for the 5 1/4" x 4" section. I used a stamp from the Sassy Salutations stamp set for the sentiment.
Add a little circle with the initial of the person you're giving the card to and place on the pocket, glue everything together, draw some hair with a Basic Black marker and you're done!
Hopefully the explanation is clear! If you have any questions feel free to ask away. I know what can seem clear when you've already made something can be very confusing to someone who is just reading about it. :)
May you all have your own minion hugs,
Colleen
It's the Blog Hogger here with a special punch art card I made for a good friend of mine. She is an absolute sweetie and will, I'm sure (I hope? lol), think this card is adorable . . . even tho' she's a grown woman and not a nine year old! I mean, seriously? Who wouldn't love to have their own minions! lol
Anyway, here's the card:
I think it's hilarious, but as Katherine pointed out, I have been stuck in the house for two months and little things amuse me way more than they used to! lol
Katherine watched me make the smaller minion on Sunday and noted that it was a fair bit of work. I have to agree with her and certainly wouldn't make this card a number of times, but I completely enjoyed designing it, using a picture of two minions as inspiration. Yup, that means it is an original!
Now let's see if I can translate those minions into a picture tutorial. :) I'm going to explain how to do the one-eyed minion...
First, here's the pic which shows the different sizes and punches used for everything except the eye:
Next, I'll show you how I rounded the top of the head:
I cut the strip of So Saffron cardstock just slightly smaller than the 1 1/4" circle punch and rethreaded it through the top. I cut the 3" length after I did this step.
The next picture shows the sizes for the eye:
I had to use a non-Stampin' Up punch to get the brown circle, since I needed it to be much smaller than the white circle. However, the white and black circles are from the Owl Builder punch.
This is how I made the denim look for the pants. It's a two-step process:
Simply swipe the large Night of Navy ink pad over a piece of Soft Sky cardstock in one direction.
Next, turn the cardstock and swipe it in the other direction. Easy!
Don't forget to darken the edges before you assemble your minion. I used a Night of Navy marker to darken the denim edges.
I sponged the edges of the So Saffron and Smoky Slate cardstock. I used a Sponge Dauber to do the little ring since it was so small and getting the middle of it sponged was just easier with a Sponge Dauber.
And that's it! I used Basic Black cardstock for the body of the card and Tempting Turquoise for the 5 1/4" x 4" section. I used a stamp from the Sassy Salutations stamp set for the sentiment.
Add a little circle with the initial of the person you're giving the card to and place on the pocket, glue everything together, draw some hair with a Basic Black marker and you're done!
Hopefully the explanation is clear! If you have any questions feel free to ask away. I know what can seem clear when you've already made something can be very confusing to someone who is just reading about it. :)
May you all have your own minion hugs,
Colleen
Wednesday, July 2, 2014
With You, May The Force Be! Hmmm?
Good morning, inky people!
It's the Blog Hogger again. I know, I know! I high-jacked Kathy's blog just a few days ago and now I'm doing it again. However, I just made the most adorable card for my oldest daughter's birthday and I have to share it! lol
My daughter is a Star Wars fan and I found a card showcasing Yoda, the wise old green character. (Except for the color, that description fits me! lol)
I found the card and free tutorial at cardsandacuppa.blogspot.ca. Just scroll down the left-hand side of the page to find the free tutorial. It's extremely well-done!
Now that card was made for a 9 year old, and my daughter is an adult but I still think she will love it! :)
Anyway, here's the card:
I kept pretty true to the original design, just changing his mouth and light saber a bit. The real "Blog Hogger" touch is the background. The "wooden" cupcake stand is my take on the wooden cake stand she had at her wedding last summer. Nice touch, eh? (Canadian, I am! he he)
May the force be with you hugs,
Colleen
It's the Blog Hogger again. I know, I know! I high-jacked Kathy's blog just a few days ago and now I'm doing it again. However, I just made the most adorable card for my oldest daughter's birthday and I have to share it! lol
My daughter is a Star Wars fan and I found a card showcasing Yoda, the wise old green character. (Except for the color, that description fits me! lol)
I found the card and free tutorial at cardsandacuppa.blogspot.ca. Just scroll down the left-hand side of the page to find the free tutorial. It's extremely well-done!
Now that card was made for a 9 year old, and my daughter is an adult but I still think she will love it! :)
Anyway, here's the card:
I kept pretty true to the original design, just changing his mouth and light saber a bit. The real "Blog Hogger" touch is the background. The "wooden" cupcake stand is my take on the wooden cake stand she had at her wedding last summer. Nice touch, eh? (Canadian, I am! he he)
May the force be with you hugs,
Colleen
Sunday, April 20, 2014
Happy Easter to Everyone!
Hi everyone,
It's Katherine & the Blog Hogger, along with their favorite Easter pet, here to wish you all a very Happy Easter!
The very quick details for this card are;
It's Katherine & the Blog Hogger, along with their favorite Easter pet, here to wish you all a very Happy Easter!
- Cardstock: Baked Brown Sugar, So Saffron, Daffodil Delight, Old Olive & Whisper White
- Stamp set: Eggstra Spectacular
- Ink: Stazon Black & Soft Sky
- Extras: Random Designer Paper, Owl Builder & 1" Circle punches (chick), Cupcake Builder punch & random Embossing Folder (clouds), Oval & 3/16" Corner punches, various Stampin' Up markers
Easter chocolate hugs,
Katherine & Colleen
Wednesday, February 13, 2013
She has Arrived!
Good Day Stampers!
Well Emily and Carrie have finally arrived safe and sound. Emily is settling in quite nicely and Nana and Pop are having a ball.
Yesterday was like Christmas, what with all the presents under the Christmas Tree! Yes I said Tree! I left the Christmas Decorations up for my daughter and baby. But will be taking them down later this week. I just wanted to give them a Christmas in Newfoundland. lol. DD was very surprised and pleased by this. Emily has enough toys and books to last for the month she will be here.
I guess by now you are ready for some card photos. Too bad cause I don't have one for you today. Because I have to show you the finished wall in the bedroom that I made for Emily. I had so much fun doing this. My thanks to Jackie Topa, the queen of all things punched! I have downloaded lots of her work over the course of five years. So here goes!
Well Emily and Carrie have finally arrived safe and sound. Emily is settling in quite nicely and Nana and Pop are having a ball.
Yesterday was like Christmas, what with all the presents under the Christmas Tree! Yes I said Tree! I left the Christmas Decorations up for my daughter and baby. But will be taking them down later this week. I just wanted to give them a Christmas in Newfoundland. lol. DD was very surprised and pleased by this. Emily has enough toys and books to last for the month she will be here.
I guess by now you are ready for some card photos. Too bad cause I don't have one for you today. Because I have to show you the finished wall in the bedroom that I made for Emily. I had so much fun doing this. My thanks to Jackie Topa, the queen of all things punched! I have downloaded lots of her work over the course of five years. So here goes!
First up is a cute little bear with a basket of berries. I used a square punch to make the basket and then rounded off two corners. I cut several strips of Crumb Cake and sponged them with Soft Suede ink. I glued the top strips on and then wove the other strips and stuck some glue on the ends to secure. I punched out a lot of very small circles using Real Red card stock and the I put some glue on the top of the basket and just pressed the basket into the pile of dots. Voila! A basket of berries! I then added some Crystal Effects to make sure they stayed on and also to give them some shine.
A little bear peeking up from the top of the bush!
Well what would a woodland scene be without a rabbit. I used the large heart punch for the body and Oval punches for the ears. You should have seen my room when I was done. I think I used every punch I owned and I few I had forgotten about lol.
Owls and really whimsical birds, butterflies and flowers. Wow there's a lot going on here.!!
Oh Oh another bunny and what's that in the punched out tree? Yep, another owl!
Seriously I has no idea there were so many ways to make an owl!
I added a few smaller owls (found some smaller circle plates :O)
Another blue owl. This one was punched out with the tab punch, the scallop circle punch and a few smaller circle punches.
Here is a street view of the whole set up!
Another look at the bunnies and birds.
And finally my two super cute bears. This was definitely a work of love.
Now I am not worried about Emily eating the card stock, cause she is still too little to stand up by herself. But Stampin' Up! card stock and punches are so much fun to add that little something for a little someone!
I will be back tomorrow with another post and to tell you some exciting news that has come from another announcement from SU! Whew the staff at SU are burning up the ideas lol! But I think you will like this one for sure.
Contented Nana hugs!
Sunday, December 23, 2012
Merry Christmas to one and All!
Good day Stampers!
I notice by the date on the previous post that it has been about 10 days since I posted to my blog. I have quite a few things done since then but the biggest problem is all of the things I have created will be given to people on Christmas day and I don't really want to spoil their surprises.
I have been creating bags for wrapping, gift card holders galore and a cute little paper ornament for my new grandchild, Emily.
Today I am going to share the ornament for Emily as she is much too small to read this blog. Thank goodness for that, otherwise I would have nuttin'.
So here we go -
I notice by the date on the previous post that it has been about 10 days since I posted to my blog. I have quite a few things done since then but the biggest problem is all of the things I have created will be given to people on Christmas day and I don't really want to spoil their surprises.
I have been creating bags for wrapping, gift card holders galore and a cute little paper ornament for my new grandchild, Emily.
Today I am going to share the ornament for Emily as she is much too small to read this blog. Thank goodness for that, otherwise I would have nuttin'.
So here we go -
This was made using various punches. The 2 3/4" circle for the ornament, 1" circle for the hands,
1 3/4" circle for the body and 1 3/8" circle inside the body, 3/4" circle for the nose and a hole punch for the pink dot on his nose. I used a framelit for the head and hat. I used a Scallop oval punch for the brim of the hat. The ears are done with a 1 1/4" circle punch and the 1" circle for the inside of the ears.
I punched out the flower with a retired punch called trio blossom. I then made the smaller flower using the itty bitty punch from the punch pack. I used the Bitty Banner framelit for the banner. I embossed the swirl from Elements of Style on the Brushed Silver card stock with Silver embossing powder. The mouse is done in Soft Suede and Crumb cake and the hat in Real Red. I sponged all the parts of the mouse before gluing it together. Whew!
I think I will call this my $500.00 ornament! When you are making something and you just reach out and grab what you need, it really doesn't seem like much, but then you have to let people know what you used and your mind blows up! lol
I am leaving you today with a picture of Emily, who by the way now has two bottom teeth showing! Reminds me of that song, you know the one, "All I want for Christmas is my Two Front Teeth!
What a little cutie!
And before I go here is a little funny for you!
I know I have a warped sense of humour, but I am dealing with it! hahaha!
Toothy and toothless hugs!
Sunday, August 12, 2012
Hello Baby Card
It's the Blog Hogger, aka Kathy's sister, back from my cruise and
Today I finally got everything unpacked and, for the most part, put away. It was a huge job simply because I think I took everything that wasn't nailed down with us on our trip. In fact, I'm pretty sure I pried the nails out of some things just so we could take a few more totally unnecessary items with us! However, if you are at all concerned about a disaster happening when on vacation, necessitating the need for any one of a variety of suddenly-needed items, I'm the person you should be travelling with! lol
Anyway, once I'd finished with the unpacking I suddenly realized that I needed to make a baby card for my niece and her husband. If you've been following this blog, you know that Kathy's daughter gave birth recently. Since I've been out of the country, today was the first day I got a chance to make an appropriate card.
WARNING: Kathy, you are allowed to view this posting but you must, under pain of incessant teasing ('cause what else do younger sisters do), keep Carrie from seeing this until she gets her card in the mail!
Okay, everyone can now relax and continue reading . . .
After agonizing for a couple of hours [my husband calls it being obsessive, while I call it being a tortured genius :)] I came up with this card:
And here's a picture from the side so you can see where I used Dimensionals: lots and lots of Dimensionals! :)
Here are the details;
- I used Chocolate Chip cardstock (cs) for the background cut at 5 1/2" and scored at 4 1/4".
- The pink designer paper is cut at 5 1/4" x 4".
- The "bureau" is a piece of Crumb Cake cs cut at 2 1/4" x 3 1/2". I used the Curly Label punch to make the legs. Each of the drawers are 2" x 3/4", have Metallic Brads for drawer pulls, and I used a scrap of Victoria Crochet Trim to simulate a piece of material sticking out of one of the drawers. I sponged all the edges with Chocolate Chip ink and popped up the drawers with Dimensionals. I also used Dimensionals on the back of the bureau.
- I included an owl made with the Owl Builder punch, since little Emily's mom went with an owl theme in her nursery. Of course the little owl is wearing a Pretty In Pink bow made by connecting two owl feet with a Basic Pearl, and also sports a pink heart 'cause her parents just love her sooo much! I used Chocolate Chip and Naturals Ivory cs to make the body of the owl and popped it up on Dimensionals.
- The "picture" over the bureau is made using a sentiment from the Teeny Tiny Wishes stamp set, the Large Oval and Decorative Label punches, and a couple of Metallic Brads. The "Hello Baby" part is popped up on . . . you guessed it . . . Dimensionals.
Congratulations to Carrie and Steven and lots of hugs and kisses for Emily,
Colleen
Monday, April 9, 2012
What a great day!
Good Day Crafty ones!
Well yesterday's Easter family dinner went well. The food was fab, the desert amazing and the entertainment provided by my sister, priceless! Unfortunately DH missed the meal because he was out saving the world. Well not the whole world but our little corner of it. Hopefully he got the power back on in time, so others could cook their dinner lol. We did save some for him though so no worries!
I broke out the Wii game and since this is the first time Colleen had a chance to play, it was beyond priceless. She is such a nut on a regular basis, add a sugar high (three cupcakes) and some not so friendly competition and well you can guess what happened next! My MIL did the dishes (thanks Shirley!) and we played the whole afternoon away while the men watched us make fools of ourselves. Yeah Statler and Waldorf (Husbands) were just great with the advice (mostly for Colleen as they were rooting for her most of the day) and ribbing.
Also apparently there was an Easter Card CONTEST that I was unaware of! Now how could that happen you ask? (Insert from the Blog Hogger: It could happen very easily, since that's the only way I get to win a card contest! lol) Well it's easy when you have a VERY competitive family. (Oh yeah, and that too! hehehehe) Colleen decided to WIN the Easter Card Contest. I was only made aware of this so called contest, when she passed me the card she made for me.
But let it be known that I did a creditable job on the card I gave her. (Your card was absolutely gorgeous, Kathy!) I didn't go down without a fight! Have a look at my card first and then I will show you hers -
Well yesterday's Easter family dinner went well. The food was fab, the desert amazing and the entertainment provided by my sister, priceless! Unfortunately DH missed the meal because he was out saving the world. Well not the whole world but our little corner of it. Hopefully he got the power back on in time, so others could cook their dinner lol. We did save some for him though so no worries!
I broke out the Wii game and since this is the first time Colleen had a chance to play, it was beyond priceless. She is such a nut on a regular basis, add a sugar high (three cupcakes) and some not so friendly competition and well you can guess what happened next! My MIL did the dishes (thanks Shirley!) and we played the whole afternoon away while the men watched us make fools of ourselves. Yeah Statler and Waldorf (Husbands) were just great with the advice (mostly for Colleen as they were rooting for her most of the day) and ribbing.
Also apparently there was an Easter Card CONTEST that I was unaware of! Now how could that happen you ask? (Insert from the Blog Hogger: It could happen very easily, since that's the only way I get to win a card contest! lol) Well it's easy when you have a VERY competitive family. (Oh yeah, and that too! hehehehe) Colleen decided to WIN the Easter Card Contest. I was only made aware of this so called contest, when she passed me the card she made for me.
But let it be known that I did a creditable job on the card I gave her. (Your card was absolutely gorgeous, Kathy!) I didn't go down without a fight! Have a look at my card first and then I will show you hers -
This is the front of the card. I call this my $300.00 card lol. I used the background stamp "Wood Grain", I cut out some Soft Suede c/s free hand to make the tree and stamped it with the wood grain stamp also. I sponged it with Soft Suede ink to make it stand out from the base of the card. I added some leaves from the Owl Builder punch in Old Olive c/s. I cut a strip of c/s in Old Olive for the grass and cut it out free hand also. The eggs came from a retired set called Easter Blossoms. The punches used were 1 3/4" circle punch the Large Oval punch and the Small oval punch (retired sorry)These made up the bunny body . I used the Boho Blossom punch for the tail. I sponged Pretty in Pink around all the edges and used some DSP for the feet and a Pretty in Pink marker for the pads of the feet.
This is the inside of the card. I used the same punches for the ears and arms but I used the Ornament Punch for the face and the smallest circle for the cheeks. I used the Owl Builder punch for the eyes and nose, which I cut with scissors. I stamped Happy Easter in Melon Mambo ink on Pretty in Pink c/s and sponged with Melon Mambo, see what I mean about a $300.00 card? (I'm exhausted . . . and impressed . . . just reading the directions! lol)
Now for the so called "Winner" of the Easter card contest!
Colleen gave me a Shadow Card for Easter. I have to admit this card is so sparkly and Spring like IRL. The picture really doesn't do it justice. My MIL looked at this card and said (out loud I might add) "She wins this time, Kathy." (Thanks, Kathy's MIL! You obviously know quality when you see it! lol) Thanks for the support MIL!
The front of this card is a "Window" made with SU's Window Sheets. I really do love this card and can see so many more possibilities. How about Mother's day?
This card will fold flat for mailing but stands alone. This is how it looks when viewed from the top.
Congrats Colleen, you did do a really great job on this one! (And now I'm blushing! It's good that I won one thing since you beat me consistently with the Wii games! lol)
Now a couple more pic's of my dinner table.
Of course you all saw the cupcake holders but look how cute with the actual dessert in them. ---
I know, are you drooling yet? They were as good as they looked, and the special surprise? A Maraschino cherry baked inside! I know, yummy! (Seriously, people, they tasted divine! I can't even describe how good they tasted! I've always wanted to go to Carlo's Bakery, of Cake Boss fame, but I don't think he could make better cupcakes . . . seriously! Well, that's twice I used the word "seriously", and I didn't use "lol" even once, so you can tell I was impressed!)
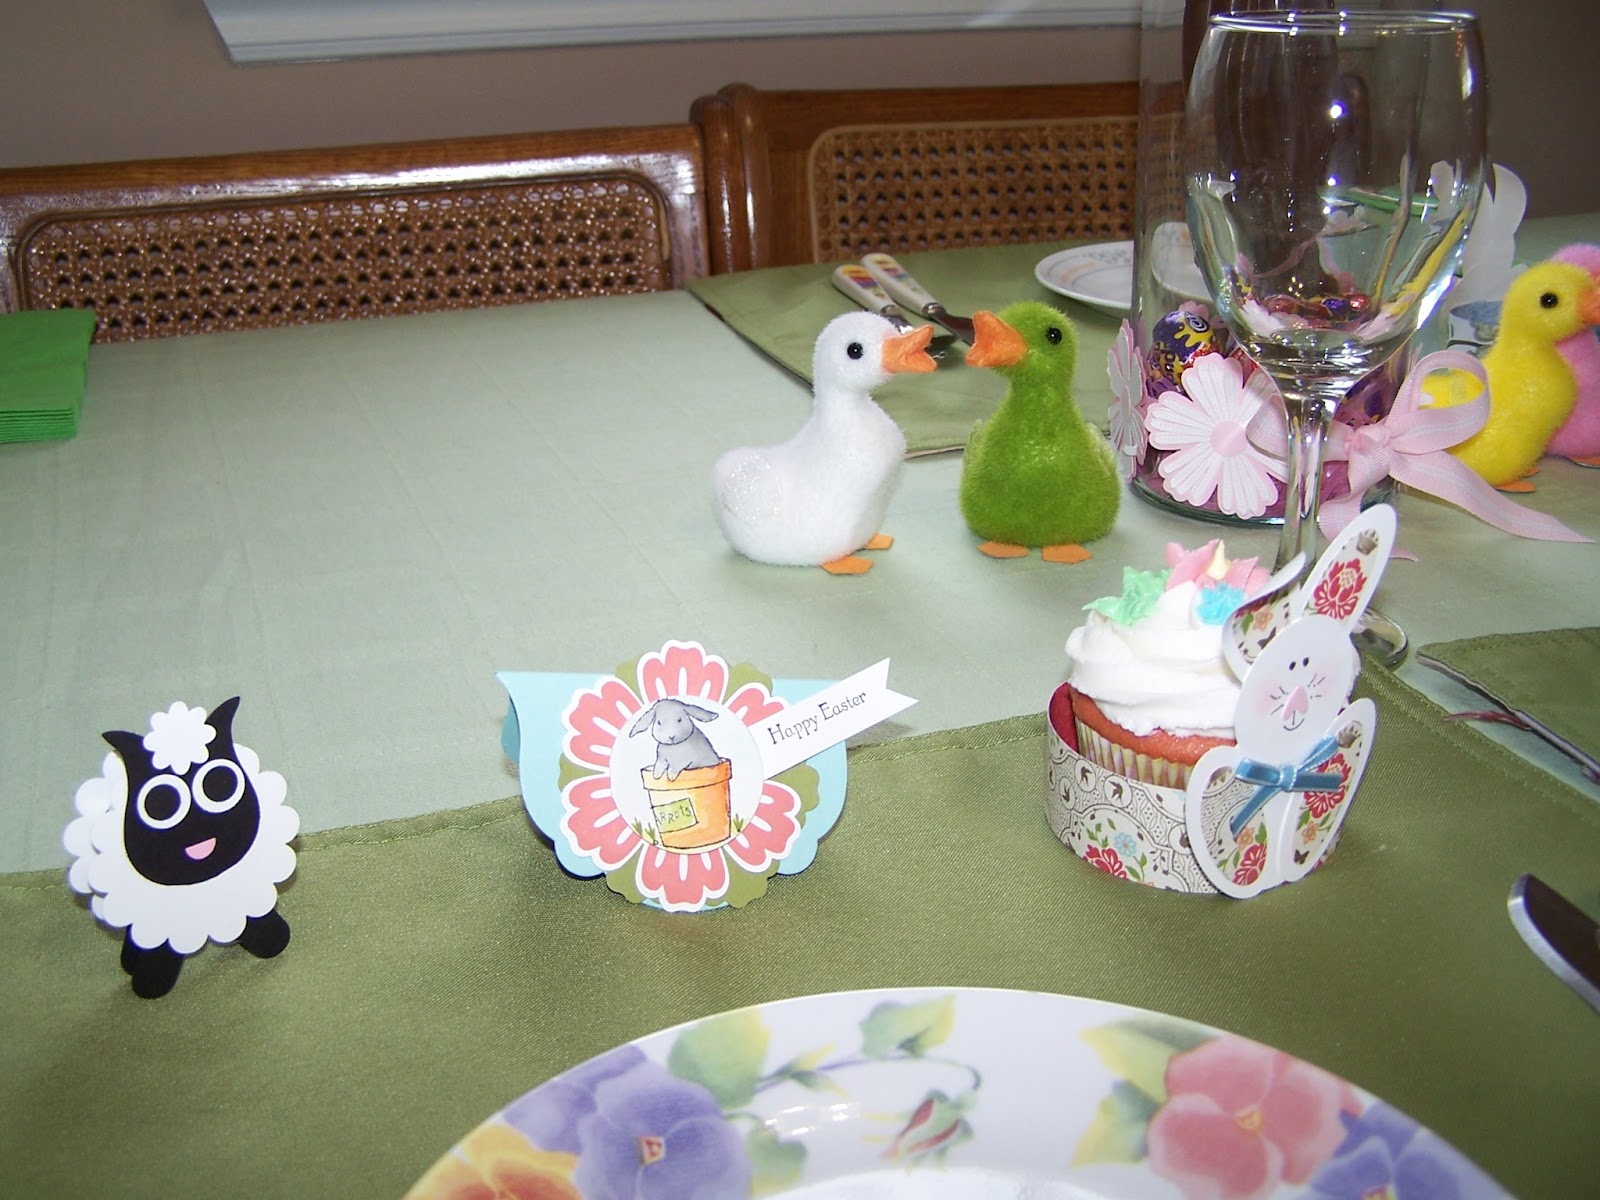
Last pic I promise.... This is a pic of the actual place setting. Colleen provided the sheep! Now for the food and wine and the table will be complete.
I am so thankful that you pop in from time to time to have a look at my creations. Thanks to all who posted comments yesterday. I read each one several times (and out loud to my family) Thanks to all who pinned me on their blogs and Splitcoast for featuring me on their weekly fav's. I now have to grease my head to get it through the door way! No seriously, thanks.
Feeling Ducky hugs!
Subscribe to:
Posts (Atom)