Hi, all you inky people!
It's the Great . . . no, not Pumpkin . . . Blog Hogger, Colleen! lol
I received a package from Stampin' Up yesterday with all kinds of goodies for an upcoming class at my house and, way more importantly, lots of fun things to play with for me! lol
Within a ridiculously short period of time, I had my new stamps mounted, conditioned, and stamped on index cards! What the heck do I mean "conditioned" and "stamped on index cards"? Funny you should ask! I just happen to have a couple of pictures taken which should explain those ideas quite nicely! lol
First, here's what I mean by "conditioned". When you first get your stamps they ink up better if you
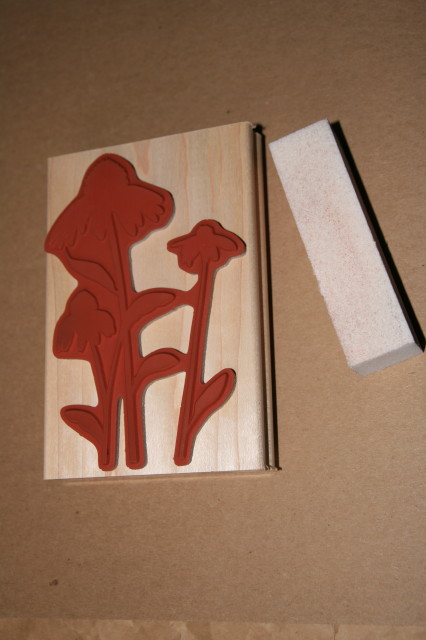
lightly run some fine sandpaper over them. This is most noticeable with stamps with a lot of rubber, like the one below. I use Stampin' Up's Sanding Blocks (p. 207 in the Idea Book & Catalogue [IBC]), which I bought a while ago. (The new ones in the IBC look a bit different.) However, you can just use regular fine sanding paper instead.
Remember, just lightly sand it!
The next picture shows what I mean about putting my stamps on index cards. Coincidentally, it also shows the difference conditioning your stamps can make.
Because I have a lot of stamps . . . and I hate looking through them all whenever I want to make a card . . . and I have a lousy memory (lol) . . . I stamp all my stamps onto index cards when I first get them. I punch a hole in the top left hand corner and add them to a ring binder. That way, when I want to make a card I can just browse through the index cards and pick a stamp set which appeals to me!
Now, look closely at the picture of the cat on the bench. Notice how light it is? I forgot to condition the stamp before I used it. I did, however, condition the other three stamps in the set. See how much better those stamps picked up the ink? (And, yes, I conditioned the other stamp later! lol)
And now to the card I made last night. I was looking for a very simple design that I could replicate quickly and easily . . . and that wouldn't cost too much to mail . . . for my "one-design-fits-almost-all" Christmas card. See, I make special "one-of-a-kind" Christmas cards for those who I feel especially close to . . . be they family or friends . . . but pick a simple design for the rest of the people on my mailing list. (Oh poo, now I've done it, haven't I? If any of my friends read this blog . . . and I know they do . . . I won't be able to send them the card I'm about to show you! lol)
See, it's very clean and simple . . . like me after a bath! lol It uses my two favorite colors - Cherry Cobbler and Crumb Cake. I wanted to draw attention to baby Jesus, so I colored him and Mary. I tried just coloring Him but it wasn't colorful enough to draw your eye.
I think one of the nicest things about the clear-mount stamps is that you can put more than one stamp on a block, like so:
This way I don't have to line up the star on each card front. (Yes, Lisa (one of the one-of-a-kind card receivers), I'm starting to lean more towards the clear-mount stamps! lol) If you click on the picture above, you might also be able to see some round spots of glue various places on the large stamp. Sometimes I find the stamps just won't cling well to the block. When that happens I put some spots of Multipurpose Liquid Glue (aka Tombo glue) (p. 206 in the IBC) on the picture (not the rubber) and let it dry. Always
remember to let it dry before using the block with it!!! Once it does, it creates a tacky, but temporary, surface and will adhere to the block much better.
I used Stazon Ink and markers to color the picture. The last picture shows the markers I used but, more importantly, shows my new favorite product - Dazzling Details!!! I used it to outline the star. For those of you who love to use Dazzling Diamonds but want more control over where it goes, this product is like a mini miracle! (Can you tell I love, love, love it? lol)
It's found in the Holiday Mini Catalogue, which I used to own but gave to a friend. Darn! lol
Anyway, folks, that's it for now!
Dazzling detailed hugs,
Colleen